Your photographs might not be as sharp as you would want for a variety of reasons. The clarity of your photographs might be impacted by dirty equipment, poor camera settings, or even your shooting posture. But if you notice that you are still missing focus even after making all the corrections, your lens may need to be calibrated.
So, exactly how to calibrate camera lens for the best quality image?
Contents
What is Lens Calibration?
We pay a lot of money on camera equipment and expect it to perform as promised, but what we’re not told is that there are virtually always tiny variations from lens copy to lens copy and manufacturer to manufacturer.
The precise location of the spot where light is focused onto the sensor changes over time. Lens calibration deals with these variations.
If you’re using a modern DSLR, your camera probably has a setting that lets you move the focus point closer to or farther from the camera body. This setting is typically referred to as AF Microfocus or AF Fine Tune.
You should move the focus point toward the camera body if your lens is back-focusing, or focusing behind the region you’re aiming. You should move the target spot further away if the sharp area is in front of the area you were front-focusing on.
The focus point can typically be changed on most cameras in modest steps, typically ranging from -20 to +20. To adjust for rear focusing, move the point into the negative numbers (nearer to the camera), and for front focusing, move it into the positive numbers (further from the camera).
Your lens or camera won’t be physically altered by lens calibration. We’re simply discussing modifying your camera’s settings.
Why Do You Need to Calibrate Your Lenses?
You must first comprehend how DSLRs’ autofocusing functions. There are (at least) two distinct sensors in a DSLR: one for image and one for autofocusing.
Mirrors are also used to guide light to the imaging sensor or to human eyes. The mirrors are on by default. The second sensor receives some of the incoming light. The remainder is transmitted to your eye by way of the viewfinder.
To enable autofocus, halfway press the shutter button. The secondary sensor analyzes the light and gives the lens specific focus instructions. Phase detection is the technology that is employed. The mirrors raise as you snap a picture. And every bit of light reaches the main image sensor.
The issue appears when the two sensors are out of alignment. In this situation, whatever is in focus on the autofocus (AF) sensor won’t be in focus on the image sensor. The focus will change in your final image. It won’t be sharp where it ought to be.
Also, some parts in your lens might not be exactly aligned with the required factory standard. This can also result in misinterpretation by the focusing sensor.
You must calibrate (or micro-adjust) your camera and lens in both scenarios. This makes sure that they sync up seamlessly. An autofocus micro-adjustment is being made during this process.
It instructs the camera on a different approach than the default to how to interpret the data from the secondary sensor.
When Should You Calibrate Your Lens?

If you observe persistent camera focusing problems, lens calibration should be performed. That applies to either a particular lens or all lenses. To be sure they are calibrated properly, you need to check.
If you buy everything brand new and about the same time, the likelihood of having to do it is low. But if you use older lenses with new camera bodies or the opposite, the likelihood increases significantly. Or it’s more probable if you purchase your equipment after years of use.
If you drop your camera or lens, you should inspect them again. On the outside, there might not be any indication of damage (these things are robust!). But certain components may start to misalign.
After purchasing a new camera, keep in mind that you might need to calibrate your lenses once more. The modifications you made to the optical lens are unknown to the new camera (and it might not be spot-on). It would therefore be better if you calibrated them once more.
How do you know if Lens Focus is accurate?
Using one of the lens calibration techniques described below is the simplest approach to determine whether your lens focus is precise. Basically, your lens focus is likely accurate if the area you instructed the camera to focus on is the sharpest place in an image.
However, it’s a good idea to double-check, especially if you notice that your focal point’s sharpness is a little off.
How to Calibrate a Lens
Use the Optical Viewfinder
Instead of Live View, focus using the viewfinder. That’s because focusing in Live View is something altogether else. If the subject is stable, the focus in Live View always produces sharp results. Instead of a dedicated autofocus sensor, it uses the image sensor to capture focus.
Set Up Your Calibrator
Set your camera on a tripod or flat surface, such as a table, and place the focus pyramid at a distance of around 6 feet to calibrate your lenses. In order to ensure accuracy at the distance I shoot from most frequently, I normally set it up at that distance.
There is only one global option, so either way, once you modify it and establish the focus on a specific place, it “should” work well at any distance. The lesson to be learned from this is to not worry about the distance to the pyramid.
Calibrating with a Regular Calibrator (option 1)
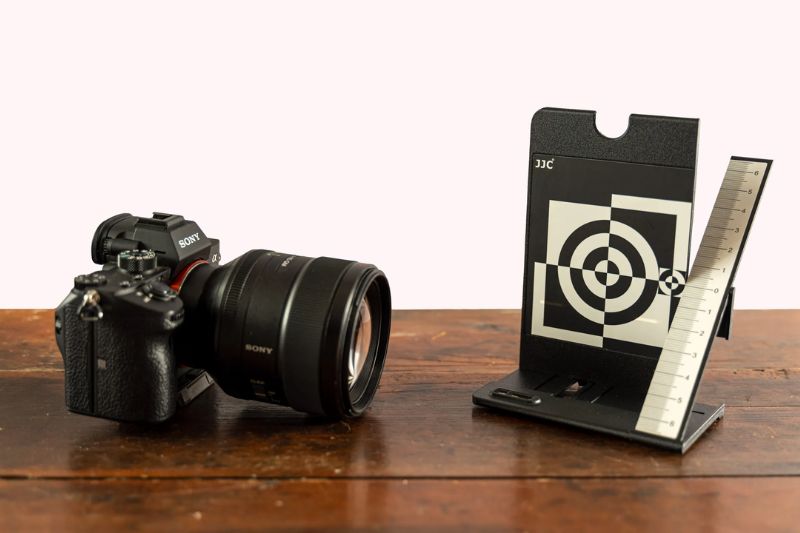
A few feet away from your lens, position the focus pyramid on a level surface. Whether it is six or ten feet away makes no difference. The adjustment applies to all distances equally.
To achieve the shallowest depth of field, now set the lens’ widest aperture. This makes checking the accuracy of your lens’ focus simpler. Set the viewfinder’s autofocus to the crosshair in the ruler’s middle. It needs to be your main point of attention. Take a picture after that.
Calibrating with a Ruler (option 2)
If you don’t have a calibrator, you can use a ruler to change your autofocus. All you have to do is set a white poster board on the ground or a small table.
Next, using your ruler and a pen or pencil, draw a horizontal line through the center. It is not required to extend the full length of the board. It should be between two and five inches.
Now select a number and place it on the line in the center of your ruler. The 15 cm point will be used in our scenario. Keep in mind that the line should be horizontal and the ruler must be vertical. Additionally, the ruler’s 15 cm mark must perfectly line up with the line you draw.
Now set up a tripod for your camera and point it down at the board. Make sure the ruler and the line are in the frame by checking your viewfinder. Select the widest aperture possible while your camera is in Aperture Priority mode. You can more easily identify the image’s clear and blurry areas because of the shallow depth of field.
Don’t activate Live View while this is going on. It sometimes lacks precise focusing. Use only your viewfinder in place of that. Target the middle of the line on the poster board using your autofocus. Take a photo once your focus is locked.
Review the picture you just took after pressing the shutter. To assist you more thoroughly analyze the intricacies, feel free to zoom in on the picture.
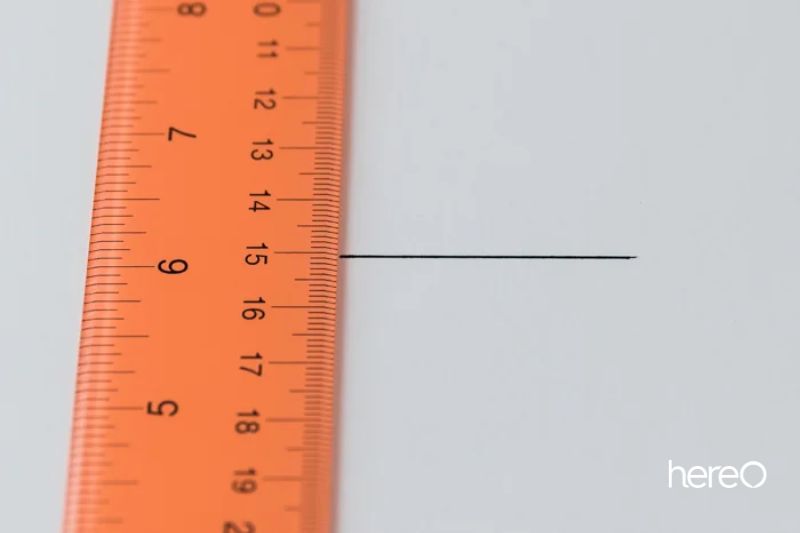
This technique’s underlying idea is identical to that of employing a common calibrator. If the marks at 13 or 14 cm are more precise than those at 15, you have a back-focusing issue. If 16 or 17 are sharper than 15, your front-focusing issue is front-focusing.
The following stage is now a little challenging. How much you wish to fine-tune must be estimated. If you have a back-focusing issue, you must descend. You must move higher if it is front-focused.
Inspect the Photo and Determine if Focusing is Accurate
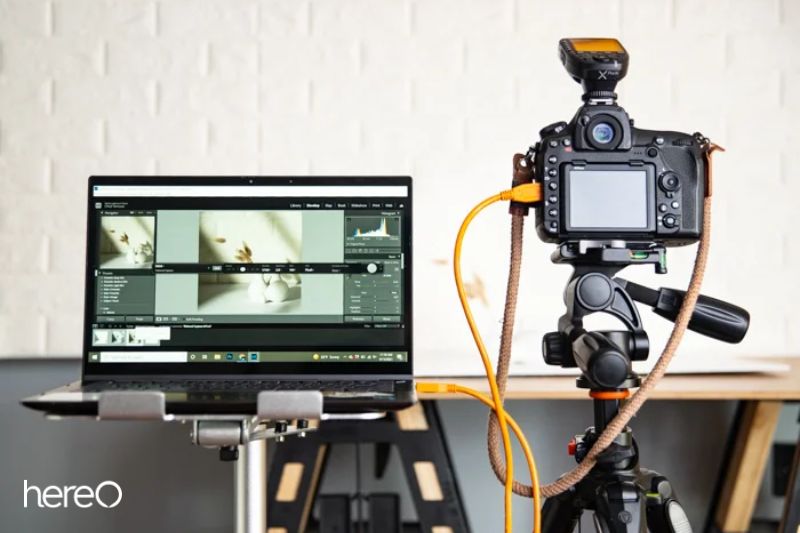
Examine the image after you’ve taken it to be sure the focusing was precise. Since you can see more clearly on a larger screen, we advise performing this on a computer. You can even wire your camera if you’d like to during this procedure.
The image’s sharpest point should be at the zero on the lens calibration chart if focusing is precise. As you get further away from zero, the other numbers should become less distinct. Your lens is doing back focus, which is when any number above zero is sharper. You have a front-focus problem if any number below zero is sharper.
You must adjust your lens for sharp focus in either scenario. You accomplish this utilizing the camera’s autofocus micro-adjustment options. Make adjustments until the ruler’s zero point is the sharpest you can achieve.
Calibrate Your Lenses Using Software
It’s simple to manually calibrate your lenses. However, it can occasionally be difficult to determine whether the corrections we made were accurate.
We advise utilizing specialized software. To achieve accurate calibration, we advise Reikan FoCal Pro Lens Calibration. It’s a better alternative to making adjustments by eye. This program verifies the accuracy of the settings you specify.
Reikan is more expensive than standard calibrators because it is software. But if you require accurate focusing, the expense is worthwhile. It excels in specialized fields like product photography.
A calibrator that you can stick to your wall is included with FoCal. You can tether your camera once the software has been uploaded. You are given instructions on how to place your device in front of the calibrator by the program. And after positioning your camera, you can begin the calibration procedure.
Calibration Using FoCal Software
The Fully Automatic Calibration with User Assistance option is yours. After that, the application begins capturing pictures automatically. If parameters need to be changed, a voice prompt will let you know which values to use.
For the following step, you must access the camera’s focusing settings. You alter the calibration values there. This cannot be done with a computer. To make the adjustments, you must enter the menu of your device.
Up until the test is over, you can anticipate hearing a few voice prompts from FoCal. It only takes a few minutes to complete the test.
Remember that most users don’t calibrate their devices with software. The manual method works well in most situations. However, it’s helpful to know that tools like the FoCal are available if you need precise modifications.
FAQs about How To Calibrate Camera Lens
How much does a camera lens calibration cost?
You can get your lenses professionally calibrated by sending them out. Depending on where you live and how many lenses you want calibrated, it might cost anything from $25 to $75 per lens. You’ll also need to factor in your mileage or shipment if there isn’t a nearby camera shop.
Is there canon lens calibration service?
Yes, there are calibration services you can send your camera to for calibration.
What distance should I calibrate my lens?
Set your camera on a tripod or flat surface, such as a table, and place the focus pyramid at a distance of about 6 feet to calibrate your lenses.
How do we calibrate a camera?
You’ll need a calibration tool, a tripod (or another method to keep your camera steady and level), your camera body, and your lens in order to calibrate your lens. For a more accurate assessment of where your focus is shifting, you’ll also need a computer and monitor to review the images on. The process is accelerated if your camera and computer can be tethered.
Conclusion
If you are still having trouble with blurry images, it might be time to calibrate your camera lens. This process is relatively simple and only requires a few tools.
HereOfamily thank you for reading. We hope you find this article helpful.
